Thursday, December 29, 2011

Adding Context Menu to Desktop – Control Panel, Softwares and System Tools

Context Menu are right click options or popup menus that offers choices of action needed by the user. Here’s how to get into tweaking and installation of those options through RegDevelop and Windows Registry.

cp


Created program using Regdevelop (Complete)
regdevelop


Regdevelop let’s you create a graphical user interface for these tweaks, Click here to download the complete version of the tool for easy installation of Right-Click Menus.


1/25/2012: Click here to download the latest version (with Switch to Integrated Development Environment)
New! 9/1/2012: (Click here) Added Computer Icon Right-Click Menus

For People who already knows Windows Registry

You can learn and see how it is being done through highlighted words and folder key location and registry values.


Open your notepad, copy and paste the text below, save it as [filename].reg, and make sure you select All Files (*.*)

Double-Click the file to install in Windows Registry.

Method #1 – Control Panel Menu (3 SubMenu only)
Windows Registry Editor Version 5.00
[HKEY_CLASSES_ROOT\DesktopBackground\Shell\Control]
"MUIVerb"="Control Panel"
"icon"="control.exe,0"
"SubCommands"="EaseOfAccessCenter;SystemProperties;Calculator"
[HKEY_LOCAL_MACHINE\SOFTWARE\Microsoft\Windows\CurrentVersion\Explorer\CommandStore\shell\EaseOfAccessCenter]
@="Ease of Access Center" "icon"="c:\\windows\\system32\\utilman.exe,0"
[HKEY_LOCAL_MACHINE\SOFTWARE\Microsoft\Windows\CurrentVersion\Explorer\CommandStore\shell\EaseOfAccessCenter\command]
@="control access.cpl"

[HKEY_LOCAL_MACHINE\SOFTWARE\Microsoft\Windows\CurrentVersion\Explorer\CommandStore\shell\SystemProperties]
@="System Properties"
"icon"="sysdm.cpl,0"
[HKEY_LOCAL_MACHINE\SOFTWARE\Microsoft\Windows\CurrentVersion\Explorer\CommandStore\shell\SystemProperties\command]
@="control sysdm.cpl"
[HKEY_LOCAL_MACHINE\SOFTWARE\Microsoft\Windows\CurrentVersion\Explorer\CommandStore\shell\Calculator]
@="Calculator"
"icon"="calc.exe"
[HKEY_LOCAL_MACHINE\SOFTWARE\Microsoft\Windows\CurrentVersion\Explorer\CommandStore\shell\Calculator\command]
@="calc.exe"

Method #2 – Softwares and System Tools Menu (3 Sub-Menu only)
Windows Registry Editor Version 5.00
[HKEY_CLASSES_ROOT\DesktopBackground\Shell\System]
"MUIVerb"="System Tools" "icon"="C:\\Windows\\system32\\wucltux.dll"
"ExtendedSubCommandsKey"="DesktopBackground\\ContextMenus\\system"
[HKEY_CLASSES_ROOT\DesktopBackground\ContextMenus\system]
[HKEY_CLASSES_ROOT\DesktopBackground\ContextMenus\system\shell]
[HKEY_CLASSES_ROOT\DesktopBackground\ContextMenus\system\shell\cmd1] "icon"="%windir%\\system32\\charmap.exe,0"
"MUIVerb"="Character Map"
[HKEY_CLASSES_ROOT\DesktopBackground\ContextMenus\system\shell\cmd1\command]
@="charmap.exe"

[HKEY_CLASSES_ROOT\DesktopBackground\ContextMenus\system\shell\cmd2]
"icon"="control.exe,0"
"MUIVerb"="Control Panel"
[HKEY_CLASSES_ROOT\DesktopBackground\ContextMenus\system\shell\cmd2\command]
@="control.exe"
[HKEY_CLASSES_ROOT\DesktopBackground\ContextMenus\system\shell\cmd3]
"icon"="%windir%\\system32\\cleanmgr.exe,0"
"MUIVerb"="Disk Cleanup"
[HKEY_CLASSES_ROOT\DesktopBackground\ContextMenus\system\shell\cmd3\command]
@="cleanmgr.exe"
[HKEY_CLASSES_ROOT\DesktopBackground\Shell\Softo]
"MUIVerb"="Softwares"
"ExtendedSubCommandsKey"="DesktopBackground\\ContextMenus\\tools"
"icon"="C:\\Windows\\system32\\wucltux.dll,7"
[HKEY_CLASSES_ROOT\DesktopBackground\ContextMenus\tools]
[HKEY_CLASSES_ROOT\DesktopBackground\ContextMenus\tools\Shell]
[HKEY_CLASSES_ROOT\DesktopBackground\ContextMenus\tools\Shell\cmd1]
"MUIVerb"="Bluetooth File Transfer"
"icon"="%SystemRoot%\\system32\\fsquirt.exe,0"
[HKEY_CLASSES_ROOT\DesktopBackground\ContextMenus\tools\Shell\cmd1\command]
@="fsquirt.exe"

[HKEY_CLASSES_ROOT\DesktopBackground\ContextMenus\tools\Shell\cmd2]
"MUIVerb"="Calculator"
"icon"="calc.exe,0"
[HKEY_CLASSES_ROOT\DesktopBackground\ContextMenus\tools\Shell\cmd2\command]
@="calc.exe"
[HKEY_CLASSES_ROOT\DesktopBackground\ContextMenus\tools\Shell\cmd3]
"MUIVerb"="Command Prompt"
"icon"="%windir%\\system32\\cmd.exe,0"
[HKEY_CLASSES_ROOT\DesktopBackground\ContextMenus\tools\Shell\cmd3\command]
@="cmd.exe"

Method #3 – Computer Icon right-click Menu entries
[HKEY_CURRENT_USER\Software\Microsoft\Windows\CurrentVersion\Explorer\HideDesktopIcons\NewStartPanel]
"{20D04FE0-3AEA-1069-A2D8-08002B30309D}"="0"
[HKEY_CLASSES_ROOT\CLSID\{20D04FE0-3AEA-1069-A2D8-08002B30309D}\shell\Hibernate]
"icon"="C:\\Windows\\system32\\imageres.dll,27"
[HKEY_CLASSES_ROOT\CLSID\{20D04FE0-3AEA-1069-A2D8-08002B30309D}\shell\Hibernate\command]
@="rundll32.exe Powrprof.dll,SetSuspendState Hibernate"
[HKEY_CLASSES_ROOT\CLSID\{20D04FE0-3AEA-1069-A2D8-08002B30309D}\shell\Lock]
"icon"="C:\\Windows\\system32\\imageres.dll,54"
[HKEY_CLASSES_ROOT\CLSID\{20D04FE0-3AEA-1069-A2D8-08002B30309D}\shell\Lock\command]
@="Rundll32.exe user32.dll LockWorkStation"
[HKEY_CLASSES_ROOT\CLSID\{20D04FE0-3AEA-1069-A2D8-08002B30309D}\shell\Restart]
"icon"="C:\\Windows\\system32\\imageres.dll,95"
[HKEY_CLASSES_ROOT\CLSID\{20D04FE0-3AEA-1069-A2D8-08002B30309D}\shell\Restart\command]
@="Shutdown.exe -r -t 00"
[HKEY_CLASSES_ROOT\CLSID\{20D04FE0-3AEA-1069-A2D8-08002B30309D}\shell\Shutdown]
"icon"="C:\\Windows\\system32\\shell32.dll,137"
[HKEY_CLASSES_ROOT\CLSID\{20D04FE0-3AEA-1069-A2D8-08002B30309D}\shell\Shutdown\command]
@="Shutdown.exe -s -t 00"
[HKEY_CLASSES_ROOT\CLSID\{20D04FE0-3AEA-1069-A2D8-08002B30309D}\shell\Sleep]
"icon"="C:\\Windows\\system32\\imageres.dll,192"
[HKEY_CLASSES_ROOT\CLSID\{20D04FE0-3AEA-1069-A2D8-08002B30309D}\shell\Sleep\command]
@="Rundll32.exe Powrprof.dll,SetSuspendState Sleep"
[HKEY_CLASSES_ROOT\CLSID\{20D04FE0-3AEA-1069-A2D8-08002B30309D}\shell\Switch user]
"icon"="C:\\Windows\\system32\\imageres.dll,83"
[HKEY_CLASSES_ROOT\CLSID\{20D04FE0-3AEA-1069-A2D8-08002B30309D}\shell\Switch user\command]
@="tsdiscon.exe"

For more advanced option… you can dig more by going to regdevelop folders and see the complete commands and registry values.
regdevelop_files_


Works with Windows 7 and above…


Enjoy!

References
http://msdn.microsoft.com/en-us/library/bb761870(v=VS.85).aspx
http://io-repo.blogspot.com/2011/05/cascading-context-menus-via-static.html
http://msdn.microsoft.com/en-us/library/windows/desktop/hh127431(v=vs.85).aspx
http://www.askvg.com/add-cascading-menus-for-your-favorite-programs-in-windows-7-desktop-context-menu/

Wednesday, November 2, 2011

Have Fun studying various information related to Computers

startmenu_codes

This is an update for the website http://windowsforus.com

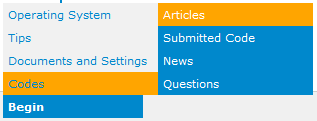
Cool!? Its not an OS, just a menu for articles, sign up options and many other things.

Actually, the project started several months ago between April and May. It was exciting because I started from nothing, only studying few portions.

This is the initial work from April to May 2011

signup_option

- cope up with detection features

sign_in

Initial Ideas (many features)

initial

Great! This project keeps me on going, this project for me, is the start of being a professional web developer and blogger since 2007.

During August, I updated youtube file hack because its already not working for several months or maybe almost a year. Try the tool!

Why I can’t post the latest work?

There are still many work to be done, and its very difficult to finish everything. I work faster and faster during May and I end up working too slow starting from June to October.

Try now! http://windowsforus.com

Tuesday, October 18, 2011

Using RegDevelop to Create your own Hardware and System Information Program

Gathering of computer hardware and system information about the central processing unit (CPU), Memory Card (RAM), BIOS, motherboard, and other hardware peripherals are usually needed in many cases for hardware verification, driver installation and driver update.

hardware

Here’s a guide to create your own program using Regdevelop. All you need are commands use to get the hardware information.

How-to-do

Open the program and drag the button control and start configuring the settings.

buttoncontrol

Sample Settings

settings

hardwareinfo

----------------------------------------------------------------

Caption

CPU Current Voltage and Caption

StartProcess

cmd /k wmic cpu get caption,currentvoltage

----------------------------------------------------------------

Caption

System Information Tool

StartProcess

msinfo32

----------------------------------------------------------------

Caption

Current Clock Speed

StartProcess

wmic cpu get CurrentClockSpeed,MaxClockSpeed /every:3

----------------------------------------------------------------

Caption

Memory Card Information

StartProcess

cmd /k wmic memorychip get FormFactor,serialnumber,partnumber,speed,capacity,name

----------------------------------------------------------------

Caption

BIOS Information

StartProcess

cmd /k wmic bios get name,version,serialnumber

----------------------------------------------------------------

Caption

BaseBoard Information

StartProcess

cmd /k wmic baseboard get manufacturer,serialnumber

----------------------------------------------------------------

Caption

Get Network Card MacAddress

StartProcess

cmd /k wmic nic get macaddress,description,speed

----------------------------------------------------------------

Caption

CDROM Drive Information

StartProcess

cmd /k wmic cdrom get drive,id,volumeserialnumber,manufacturer

----------------------------------------------------------------

Caption

Disk Drive Information

StartProcess

cmd /k wmic diskdrive get model,serialnumber,size

----------------------------------------------------------------

Caption

DirectX Diagnostic Tool

StartProcess

dxdiag.exe

----------------------------------------------------------------

Finally, Click the Build Now Button. Enjoy!

Friday, October 7, 2011

How to get the Current CPU Clock Speed, Computer Service Tag Number, Bios Name and Version using WMI

Computer stickers holds your computer service tag number or serial number information and if the technical support person needs to get the number as soon as possible. How will you solve the problem using only the command prompt?

Got an overheating problem and you need to check the current clock speed of your computer? Here’s a quick tip for windows built-in utility using Windows Management Instrumentation (WMI) called wmic.

Open the command prompt (Start Search –> cmd) and type the following command for BIOS Name, Service Tag Number and Version

wmic bios get name,serialnumber,version

Computer System Product information Name, Identifying Number and UUID

wmic csproduct get name,identifyingnumber,uuid

CPU Name, Current Clock Speed and Maximum Clock Speed

wmic cpu get name,CurrentClockSpeed,MaxClockSpeed

You can monitor the changes in CPU clock speed every Seconds

e.g. 3 seconds

wmic cpu get name,CurrentClockSpeed,MaxClockSpeed /every:3


Thanks for reading the article!

Thursday, October 6, 2011

Using Subst command to create virtual drives

Subst is being use to associate or substitutes folders as virtual drives. The command lets you access data easily and By functionality, its almost the same as creating folders to computer window.

Lets try using the command by creating drive S: using the folder c:\files.

type “cmd” at Start search, and follow the command below

commandprompt

s: – virtual drive letter

files – folder that you want to associate (c:\files)

localdisk

Afterwards, you’ll see the virtual drive instantly. Anyway, the problem with the command, when the computer restarts, all created virtual drives will be deleted automatically.

So, Let’s solve and try loading the commands before logging into windows.

Open your Notepad and write the command

subst s: c:\myfiles\videos
subst x: c:\backup

Use File > Save As and go to the following folder location

C:\Users\[username]\AppData\Roaming\Microsoft\Windows\Start Menu\Programs\Startup

Make sure that you Click ALL Files (*.*) and write the filename

subst_batchfile

Great?!

To delete any virtual drive use the command SUBST Drive /d

e.g. Subst s: /d

Usage

C:\Users\mstouch>subst /?
Associates a path with a drive letter.

SUBST [drive1: [drive2:]path]

SUBST drive1: /D

drive1: Specifies a virtual drive to which you want to assign a path.

[drive2:]path 

Specifies a physical drive and path you want to assign to a virtual drive.

  /D             Deletes a substituted (virtual) drive.

Type SUBST with no parameters to display a list of current virtual drives.

C:\Users\mstouch>

Thanks for reading the article!

Sunday, October 2, 2011

How to Remove items at most recently used lists for Run Window

runmrurunmru_edit

If your computer are shared by your family, privacy sometimes are very important - editing history list from your run window is a very cool topic.

Here’s how…

Open your registry editor, press Win + R and type “regedit”

and go to the folder below

HKEY_CURRENT_USER\Software\Microsoft\Windows\CurrentVersion\Explorer\RunMRU

Look for the item that you want to remove from the list and delete

edit

Most of the data in the registry are now secured for the newer version of windows, so, editing and adding data are safe as long as any changes came from the source you trust.

Thanks for reading the article!

Friday, September 2, 2011

How to increase USB storage performance

This is a new update for Windows 7 and Windows Server to boost the speed of USB storage devices by increasing the maximum transfer size. After installing the update, you can change the maximum transfer size from 64 kilobytes (KB) up to 2 megabytes (MB) using your windows registry editor.

The hotfix is only available to the following operating systems:

  • Windows 7 and above
  • Windows 7 Service Pack 1 (SP1) and above
  • Windows Server 2008 R2
  • Windows Server 2008 R2 Service Pack 1 (SP1) and above

After installing the update here’s the Registry Hack to increase the maximum transfer length:

1. Click the Start Menu > type “regedit” in the Start Search

2. Once the registry editor is open, go to the following registry folder

HKEY_LOCAL_MACHINE\SYSTEM\CurrentControlSet\Control\usbstor\VVVVPPPP

3. Right-click any vacant space > New > DWORD (32-bit) Value

4. Type MaximumTransferLength and double-click to modify the value data

5. Select Decimal and type a value between 65535 and 2097120 (64k to 2M) e.g. 2000000

Using Regdevelop to create registry application to increase the maximum transfer size of USB devices

maxtransfersize

Drag the Checkbox control and start configuring the program using the settings below

Caption

Maximize the USB Transfer size

RegKeyPath1

HKEY_LOCAL_MACHINE\SYSTEM\CurrentControlSet\Control\usbstor\VVVVPPPP

Value_Name1

MaximumTransferLength

ValueData1

2000000

ValueType1

DWORD

Thanks for reading the tip!